Saturday, 22 December 2018

ORIGAMI BOX TUTORIAL

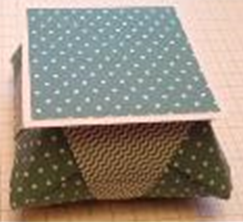
This year I've been sharing this gorgeous little gift box with my customers and just finally getting round to catching up with posting Tutorial.

Like so many of my crafting friends and Stampin’ Up! colleagues, I have a huge stash of 12” scrapbook paper that is crying out to be used.  As long as it is a perfect square, this box can be made from any size Designer Series Paper, just adjust the lid to fit your finished box.

For this box, I started with a 9” square DSP.  Set aside the leftover strips to use on the lid and a coordinating card.

1.  With pattern you want on outside of the box facing downwards, fold in half along straight edges.  Burnish edges with a bone folder.  Turn and do the same in the other direction.
2.  Fold one side only point to point diagonally and burnish edges.  Fold back on itself and  fold the same fold facing the other directions and burnish.
3.  With open end pointing towards you, find centre line and leaving point nearest you, bring right hand point to centre, burnish and repeat with left hand point.
4.  Turn over and repeat on the other side.
 
 5.  ‘Squish’ folds, lining up crease with crease to keep square and repeat on all four sides.
 

6.  Turn over to the inside and fold back the last panels made as in photo.  Fold points down, level with the next section as in photo, and repeat on all 4 sides, turning ‘pages’ as you go.


7.  Lift out 4 points and gently ‘pop’ out the sides to make box.
8.  Glue down points using red tape, rolling round under curve of box base.  I like to use a mini glue dot on the tip if needed.


For the LID
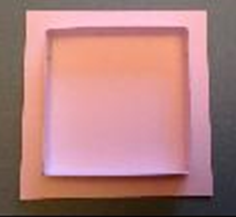
1.  Cut ONE piece of cardstock 3” square and score on all four sides at 1cm.
2.  Snip corners on opposite sides and make into a shallow box.
3.  Attach a 2¾“ piece of DSP onto 3" square of card.
4. On the back of the card & DSP piece, mark centre point and punch a small hole.
5.  Fold a small piece of ribbon in half and push through hole from the wrong side, making a neat loop of the front.  Tape the ends of ribbon flat on the inside.
6.  Stick ‘box’ into centre of flat square to make lid, as in photo.
 

Decorate your box as you wish.

I hope you have been inspired by my project today and hope you will make some yourselves.

Happy craftin'
Sandra

Contact me on : 07806 616704
For all your Stampin' Up! requirements and Special Offers, please visit : 

HOSTESS CODE for  DECEMBER is 2RQ2TRGW
Remember to quote this when you order from my Online Shop to receive random acts of kindness 'thank-you' from me after the end of the month. 

Ink Stamp Share : New Year Colour Challenge

Welcome back to our Ink, Stamp & Share Blog hop, joining myself here in Norfolk, UK and other fellow Demonstrator colleagues around the Globe.

Our theme today is taking inspiration from the colours in this graphic, as we approach the festive season and upcoming New Year celebrations.
Are you someone who sets New Years Resolutions ?  I don't tend to set Resolutions as such, as they always seem to get broken.  Instead I like to think of what I want from the year ahead, setting a few Goals to try and accomplish in the next 12-months. 
These were lovely bright colours to work with.  When working on a theme like this, I like to grab a base card and a mat panel in each colour and have a 'play' with different combinations.
Next I cut the Whisper White layer for the sentiment from the upcoming Spring/Summer 2019 catalogue Amazing Life #148750.  This was stamped on my Stamparatus #148187 using Memento Tuxedo Black Ink Pad #132708.  Sometimes, if the pressure isn't even when stamping, you might miss a bit, but with the Stamparatus, it is super easy to go back and rei-nk and stamp again exactly over the original image.  Such a wonderful addition to my crafting supplies and one I use virtually every time I stamp !  

The finished layer was then passed through the Big Shot # using the Subtle Textured Impressions Embossing Folder #143706.
The flowers were stamped onto scraps of Whisper White and coloured in using ink pads in each of the colours.  This time I used an empty Wink of Stella Glitter Brush #141897 with a drop of water, shook well to wash remaining pigment on the inner walls of the barrel and picked up the ink colour to paint with.  This left a lovely sparkly finish.  To incorporate all colours in the challenge on each card, the flower colours varied accordingly. Images were then 'fussy-cut' by hand. 

Panel was attached to each base card using Stampin' Dimensionals #104430, and flower randomly attached.

The remaining card base colours will be finished assembly later this afternoon and posted tomorrow, if you care to pop back to see other combinations.  I hope you have enjoyed my projects today and perhaps create some of your own.

Please click on the 'next' button below to hop to Deb and see what amazing creations she has for you today.  

A full list of todays participants can be found below.
https://cindysstampingcorner.com/?p=7148

Roll Call List
Alternatively, if you are looking for a Demonstrator, or would like to know more about joining my  growing team, I would be more than happy to help.  Please visit my 24/7 online shop following the link below or contact me on the details below.

Happy craftin'
Sandra
Contact me on : 07806 616704

For all your Stampin' Up! requirements and Special Offers, please visit : 

HOSTESS CODE for DECEMBER is 2RQ2TRGW
Remember to quote this when you order from my Online Shop to receive random acts of kindness 'thank-you' from me after the end of the month. 

Thursday, 20 December 2018

SDBH - SAB/Occasions Catty Sneak Peak

Welcome to our monthly Stampin' Dreams Blog Hop. This month's theme is our upcoming Sale-A-Bration and Spring/Summer catalogue. You are currently visiting Sandra from Norfolk, UK and I hope you enjoy todays creative projects, as you hop around the globe.

Today I am sharing with you my first card created using the Piece of Cake #148610 stamp set from the Spring/Summer (Occasions) catalogue, together with the co-ordinating Cake Builder Punch #148525 when buying together as a bundle, saving 10% using code #150579.

I'm looking forward to creating many more projects for my catalogue launches and classes in January.  

Starting with a Barmy Blue base card, a Stitched Shapes Oval Framelit #145372 was cut from the centre of a mat layer of Shimmery White card #121717.  The cake and cake stand were stamped and punched from the mat layer too.

The candles were stamped at the top of the oval and together with the cake and stand, coloured in using corresponding inks.  Because the colours I needed were not available in watercolour pencils, I tapped the ink pad onto the corner of a tile, picking up colour with a Blender pen #102845.

The ribbon is Organdy Ribbon Combo pack #149623  which is one of the Sale-A-Bration item available to choose for FREE with a £45 spend.  It also co-ordinates with the Gingham Gala 6"x6" Designer Series Paper #148554 which you will be able to find on p35 of the Spring Summer catalogue.  One side is a small check pattern that I have used on this card, the other side is a larger check.  Watch out for more samples coming soon.

Here I have applied a strip of tape runner through the back of the oval and positioned in a zig-zag until I was happy.  The topper as then attached using 3D foam pads.
I chose to add another 3D layer fo the bottom tier of cake.


Finally, I added some Gingham Gala Adhesive Backed Sequins #148561 randomly on the front of the finished card.

I hope the projects you've seen here on my blog today have inspired you & brightened your day.  Please see the list below and enjoy hopping through all of the people  participating below and all their wonderful projects. You won't want to miss any!

Here is the list of today's participants :-

(Tracy's link updated HERE)

If you would like your own copy of our upcoming NEW Spring/Summer catalogue or Sale-A-Bration brochure and do not have a Demonstrator, please contact me know as I would be more than happy to help.  Please visit my 24/7 online shop following the link below or contact me on the details below.
Happy craftin'
Sandra
Contact me on : 07806 616704

For all your Stampin' Up! requirements and Special Offers, please visit : 

HOSTESS CODE for  DECEMBER is 2RQ2TRGW
Remember to quote this when you order from my Online Shop to receive random acts of kindness 'thank-you' from me after the end of the month.